Showing posts with label Tutorial. Show all posts

Friday, February 21, 2014

Printing Digital Pocket Scrapbook Cards

Hey everyone!!! So I'm not sure if I have mentioned it here on my blog yet, but I have recently caught the PL (Project Life) bug!! (Also referred to as Pocket Scrapbooking...) I just found I wanted to create a scrapbook layout for every single little thing my kids did and it was so overwhelming! I got into Project Life so that I could document all the awesome things we do, and things my kids say, on a daily basis that would be almost impossible to do in a regular scrapbook. 

I was searching for a bedtime digital kit that would work in my PL album and Miss Mint, from Peppermint Creative, offered to let me play with the kit if I would share my creation! Win, win!! :) 

Before I share my page, I just wanted to let you know that printing digital cards from kits from Peppermint Creative is SO easy!!! I really couldn't believe it, so I put together a tutorial on how to easily print out these cards in Photoshop!! The tutorial will be at the end of this post... 

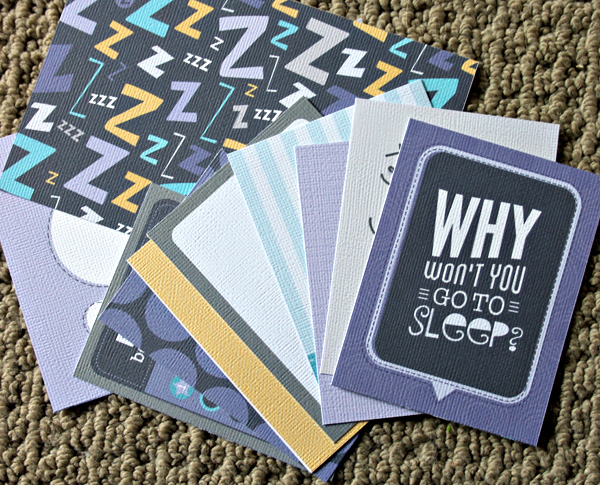
Here is a sneak peek at the AWESOME Good Night Sleep Tight Edition... 


Here is the page I came up with...


I love that this kit is so versatile that I could even use it for a page where my kids SHOULD have been in bed, but were not... 


Here is my tutorial!! 


Supplies:
- White cardstock
- Printer (this tutorial uses a wide format printer but this can easily done using any regular printer!)
- Photoshop Elements
- LIP digital kit

1. Open up Blank File in Photoshop… File, New, Blank File


2. Set size of Blank File to 12x12 inches…
    a. ‘Preset’ should be set to ‘Custom’
    b. Widths should be set in ‘Inches’ in pull down menus
    c. Resolution should be 300 DPI


3. Open up any digital ‘cards’ you would like to print
    a. TIP: Multiple cards can be selected and opened by holding down the CTRL key and clicking on the files


4. Drag and drop cards onto 12x12 file


TIP: Make sure none of the open files are maximized, or you won’t be able to drag and drop files (cards). If files ARE maximized, click on the ‘Restore’ button. You should be able to see multiple cards as well as the 12x12 file at the same time.


5. As you drag and drop the cards onto the 12x12 file, arrange them like a puzzle with no spaces in between
   a. TIP: The easiest way to do this is start with a card in the corner and line the rest of the cards up.              Zooming in on the cards also helps to line the cards up perfectly. 
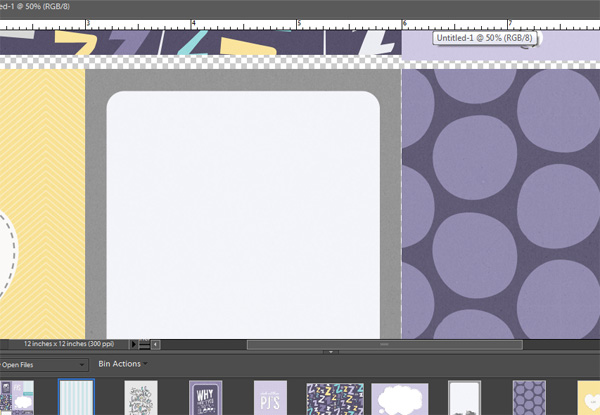

6. Since the cards are typically all 4” on one side, it’s easy to arrange them in three rows by rotating them if needed.
   a. TIP: Rotate the cards BEFORE you drag and drop them onto the 12x12 file
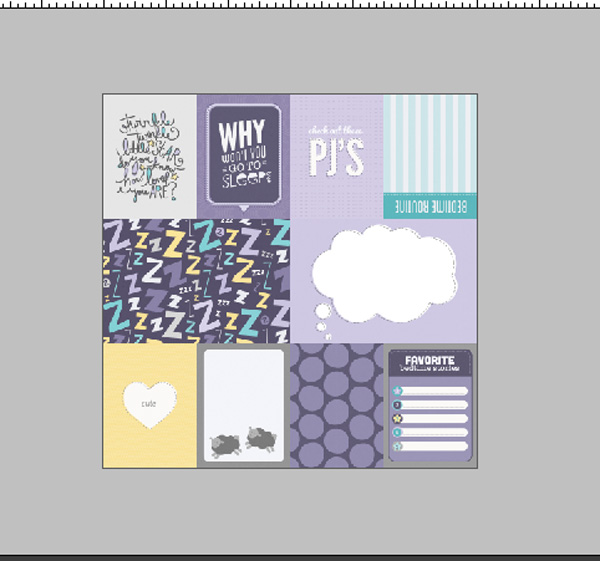

7. Once all the cards are arranged, send to printer
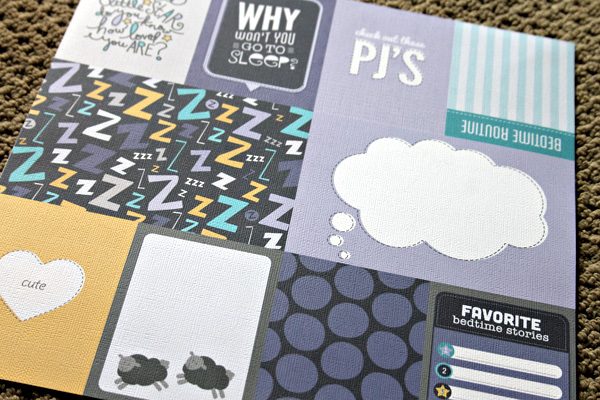

8. Cut the cards using a paper trimmer


Easy peasy, lemon squeezey!! I promise you, these digital PL cards are so addicting!! 

Thanks for stopping by today!! 

Friday, December 13, 2013

Jaded Blossom December Release Blog Hop!!

Hi Everyone! Welcome to Jaded Blossom's December Release Blog Hop.
Now if you're here from Mel's Blog then you're in the right place, if you're just passing through start at the beginning because you don't wanna miss anything. I also have the complete line up at the bottom.
If you missed my projects this week here is the highlight of it....
MONDAY 
TUESDAY  


I decided to make a fun set of shaker birthday cards!!


I used the masking technique to pick and choose parts of the Birthday Treat Tag stamps to use as sentiments on my cards.


I put together a quick little tutorial on how I put these together!! 

1. Start by cutting out the following layers with cutting machine:
- base (which you will stamp)
- acetate layer 
- top 'frame' layer


2. Using two sided foam tape (NOTE: make sure the width of your foam tape is smaller than the width of your top 'frame' layer, otherwise the tape will show after you assemble your shaker!) make an outline around the outside of the base layer. Make sure the tape pieces in the corners are perfectly flush to make sure no glitter/sequins can escape! 


 3. Once you have a border of foam tape around your base layer, peel the backing off the tape and carefully add the desired amount of sequins, etc inside the foam tape.


4. Adhere the acetate layer on top of the foam tape. 
TIP: If you are using fine glitter it may stick to the acetate due to static... One way around this is to use a dryer sheet and rub it over the acetate. I have never tried one, but I think an embossing buddy (from Stampin' Up) will work in the same way... 

5. Add your 'frame' as the final layer on your shaker. 


6. Shake and enjoy!! :) 

Jaded Blossom Stamps I used are (click on pics to visit store):


The Party Shaker Tag cutting files I used to make my cards are available in the SVG Cutting Files store!!

Regular Price for the Release Package is $144.99

Price for the Release Package will be $139.99 after Sunday Night, 12/15, 11:59pm, pst

 Freebie 3 x 3 Jaded Blossom Addict Stamp for customers that spend $40 or more before Taxes and Shipping! FREEBIE is only available until Sunday 12/15, 11:59pm pst.

Here are the Release Week treats!!


BLOG CANDY

Just leave a comment on all the blogs along the hop!


The more blogs you comment on the more chances you have to win!

THREE lucky winners will get their own personalized Jaded Blossom water 

bottle!


Three OTHER winners will win one 6x6 paper pad! 


Now on to the HOP....


Next up is my friend, Trixie!! 

Just in case you get lost here is the Entire Line Up:
Jaded Blossom
Krystle (December Guest Designer)

Tuesday, September 17, 2013

ScrapbookSteals How Tos-day! Using Pebbles Chalk

Hey friends!! Today I am over at the ScrapbookSteals blog with a video tutorial on how to use chalk to make an awesome cloud background to use on your projects!! 


Cool, right?! All you need is chalk, a cotton ball and a die cut of a cloud!! Meet you over at the ScrapbookSteals blog to peek at my video! 

Tuesday, August 20, 2013

ScrapbookSteals How Tos-Day!! Pinwheel Home Decor

It's How Tos-Day over at the ScrapbookSteals blog!!! I love using scrapbooking supplies to make home decor projects!! I used the Everyday Moments Collection from Teresa Collins to create some awesome pinwheels for my kitchen! 


Head on over to the ScrapbookSteals blog for a tutorial!!! Meet you there! ;) 

Tuesday, July 16, 2013

ScrapbookSteals How Tosday!!

Hi everyone!! So glad you stopped by today! I am actually going to direct you over to the ScrapbookSteals blog, which is where I am today, with a tutorial on how to make rosettes!


Make sure you head over there!! :) 

Saturday, July 13, 2013

Create A Customized Clothes Pin Display Tutorial!!

Custom clothespin make
Clothes Pin Display
By: Candace Zentner
I don’t know about you but I LOVE to display my creations for a while after I make them. Sometimes, I walk around the house with my latest project in my hand, just so that I can take a peek and marvel at it every few minutes. I found that I really needed a way to display my “artwork” in my craft room, so I came up with an idea using some very simple supplies and the Modern Mama kit from Peppermint Creative.
Hang art Display1 
Here is what I used to create my project:
  • Peppermint Creative Modern Mama kit
  • Silhouette Software
  • Plain White Cardstock
  • Clothes Pins
  • Paperclips
  • 3M Command Hooks
  • Twine
  • Buttons
  • Ribbon
  • Adhesive
Hang art Display2 
Here’s how to create your own clothespin display:
Step 1: Print out strips of pattern paper to cover the top of the clothes pin. I designed and cut strips using Silhouette software and the Silhouette machine, but they could also easily be cut using a simple paper cutter.
Step 2: Choose some elements to embellish your clothes pins. (I also cut these using Silhouette software/machine, but this could also be done by hand)
Display3 
Custom clothespin decorate 4 
Step 3: Using adhesive (I used ATG tape), adhere the pattern strips to the tops of the clothes pins
Custom clothespin decorate 5
Step 4: Glue a paper clip to the back of each clothes pin using a stronger adhesive, like Zip Dry glue.
Custom clothespin decorate 6
Step 5: Decorate some of the clothes pins using elements from the Modern Mama kit, combined with buttons, ribbon, etc.
Custom clothespin decorate 7
Step 6: Place Command hooks by 3M (I use them because they are not permanent and can easily be removed from wall) onto your wall.
NOTE: My hooks are hidden under a shelf but if you would like to hide the white sticker under the hook, just trim some off.
Step 7: Measure the distance between two hooks with twine, then double it. String clothes pins onto twine through the paper clips.
Step 8: Hook end of the twine with the loop over one hook, then tie the other ends of the twine around the hook on the opposite end
 Hang art Display8
Hang art Display9
Step 8: Make rosettes using a strip of pattern paper and adhere them to hooks to hide them
Hang art Display 10
Step 9: Add your projects onto your display line by clipping them in the clothes pins
Card Display Line2
This same display line can also be used to display photographs, children’s artwork, or anything else you would like to show off. Another idea is to use some of Miss Mint’s holiday themed kits to change up the clothes pins to match any upcoming holiday! Possibilities are endless!